 Italy for me From Italy with love

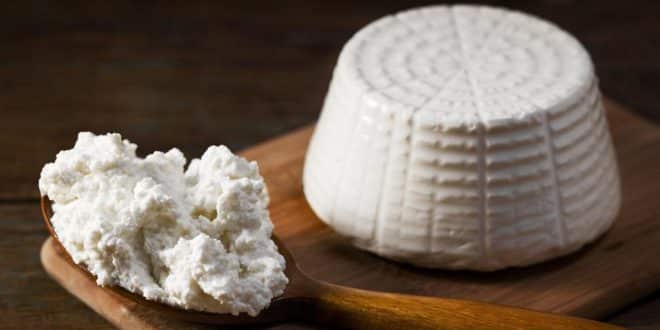
Ricotta cheese is a key component of many Italian dishes. Its popularity stems from its low fat content and relatively affordable price. But did you know that you can make it in your own kitchen? With just a few ingredients, you can have fresh Italian cheese on your table! We will present you with an easy recipe for homemade ricotta and also suggest ways to use it further.
Page Contents
Recipe for Homemade Ricotta
Milk, lemon juice, salt, and half an hour of your time – that’s all you need to make fresh homemade ricotta. You’ll be pleasantly surprised at how easy it is!
Required Ingredients and Kitchen Utensils
So, for homemade ricotta, we need to measure out:
- 2.25 liters of whole milk;
- 80 ml of lemon juice (approximately 2 medium lemons) or 80 ml of white vinegar or 0.5 teaspoon of citric acid;
- 1 teaspoon of salt (optional).
You will also need the following kitchen utensils:
- A 4-liter enamel (!) pot;
- An electronic thermometer;
- Measuring spoons;
- Cheesecloth;
- Straining bowl;
- Colander;
- Slotted spoon.
At the end of the preparation process, we will have approximately 600 ml of cheese.
Cooking Steps

First, pour the milk into the pot and place it over medium heat. Monitor the temperature using an electronic thermometer. When the temperature reaches 93 degrees Celsius (200 degrees Fahrenheit), the milk will start to rise and steam. This is the cue to remove it from the heat to avoid a mishap known as “milk boiling over.”
Next, add salt (if you prefer a slightly salty product) and the acidifying agent. In our case, pour lemon juice into the milk and gently stir.

Let the mixture sit undisturbed for 10 minutes to allow the desired reaction to take place and form cheese curds. After the designated time, you will see a clear separation between the white curd-like mass and the straw-yellow whey. To be sure, dip a slotted spoon into the mixture.
If you notice that not all of the milk has curdled (the liquid part is opaque and milky in color), add one tablespoon of lemon juice and wait for a few more minutes.

Afterward, we line the colander with cheesecloth and use the slotted spoon to transfer the large curds from the pot onto the cheesecloth. This will help prevent the whey from splashing around. Once we have removed the larger curds, we can strain the remaining mixture through the sieve.
The draining time for the whey can range from 10 minutes to an hour. You might wonder why there is such a large difference. It all depends on your preferences: after 10 minutes, you’ll have a more moist ricotta, while after an hour, the product will be drier. If, after an hour, you find the cheese to be too dry, you can remedy the situation by adding a small amount of whey.
You can use the fresh ricotta immediately or consume it as needed, storing it in the refrigerator for up to a week.
Don’t rush to discard the whey, as we can extract a bit more ricotta from it.
Second batch of ricotta cheese
- Leave the whey at room temperature in an enamel pot for 12 hours to achieve the desired acidity. After that time, place the container on the heat, attach a thermometer, and start heating it up to 200°F (93°C), while stirring continuously.
- Remove the whey from the heat, cover the pot, and wait for the whey proteins to coagulate. The curd particles will appear as white clouds floating in a completely transparent, slightly yellowish liquid.
- Carefully pour the mixture onto a sieve lined with several layers of cheesecloth. The ricotta particles this time will be smaller, so the draining process will take 2-3 hours. Attention! Do not try to scrape off the sediment on the cheesecloth for better drainage. It will disrupt the porosity of the curd, and the process will take much longer.
- Gently remove the ricotta from the cheesecloth and enjoy the result. In your hands, you have the authentic Italian whey cheese. It can be stored together with the first batch for no longer than a week.
And once again, do not discard the remaining liquid. It can be used in making ciabatta, cakes, and pastry dough. Simply replace the water indicated in the recipe with whey. It will make the baked goods more tender.
Recommendations for choosing milk
- Firstly, it is preferable to use whole milk. If you are unable to obtain it, 2.5% fat milk will suffice, as the ricotta will be less fatty.
- Secondly, under no circumstances should you choose completely skimmed or ultra-pasteurized milk. These types do not coagulate.
Caloric Content of Prepared Ricotta

The nutritional value of the resulting product will depend entirely on the type of milk you choose.
Here are approximate calorie values for ricotta made from whole milk per 100g of the product:
- Calories: 174 kcal
- Protein: 11.4g
- Fat: 13g
- Carbohydrates: 2.8g
- Cholesterol: 50.8mg
How to Use Ricotta

There are countless variations on how to enjoy ricotta. You can spread it on crusty bread, use it as a dressing in salads, add it to pasta, pizza, or enjoy it with vegetables and fruits.
To help you navigate the numerous ways to use ricotta, we will present you with a recipe for a delicious Italian pie.
Italian Ricotta Pie
For the crust, you will need:
- 1 cup (250 ml) all-purpose flour;
- 1.5 teaspoons baking powder;
- 50 grams of sugar;
- 35 ml chilled margarine;
- 1 egg;
- A pinch of vanilla extract.
For the filling, you will need:
- 3 eggs;
- 100 grams of sugar;
- 750 grams of ricotta cheese;
- Chocolate shavings and vanilla extract to taste.
For the filling: beat the eggs, sugar, and vanilla extract, then mix in the cheese and chocolate shavings. Set aside.
For the crust: mix the flour, baking powder, and sugar together. Add the margarine, egg, vanilla extract, and knead until a thick dough forms. Divide the dough into 2 balls, wrap them in plastic wrap, and refrigerate for 30 minutes.
Meanwhile, preheat the oven to 325 degrees Fahrenheit (165 degrees Celsius) and grease a round baking pan (preferably 22 cm in diameter) with butter. Roll out one ball of dough to a thickness of 1 mm and place it in the pan. Fill the crust with the prepared filling. To make the pie’s lattice top, roll out the second ball of dough, cut it into strips, and decorate the pie with them. Cover the pan with foil and bake for 25-30 minutes. Remove the foil and bake for an additional 30 minutes. The pie is done when a clean toothpick or skewer comes out dry.

The pie is ready, and your loved ones will be delighted!
Now you know that you can briefly experience being an Italian chef without much effort or expense. Be bold, cook with pleasure and enthusiasm! And remember, “If you can’t go to Italy, Italy comes to you!”